Showing posts with label Fall. Show all posts

Wednesday, November 5, 2014

Halloween Recap & A Simple Fall Centerpiece

This is the first Halloween that both girls were super excited to go Trick or Treating and have been talking about it for weeks!  We purchased their costumes back in September from Costco and they have been dying to wear them everyday.  Anabella picked Snow White and Olivia picked Merida, from Brave.  My dad decided to buy the girls a wig for each of their costumes and they just get me every time they put them on!!  They didn't wear them during trick or treating, but we did manage to get a few pictures before they revolted!  For Emma's pumpkin costume, I actually found it on Halloween day at a consignment store for a $1.75...SCORE!!!    


Each year we have gone to my aunt's neighborhood and walk to one end of the street and then back up the other side...it is a really LONG street!!  The girls had a blast going to each house and proudly announcing "Trick or Treat" when the door was opened and then shyly saying "Thank you" and running to show me their candy.  They would even show Emma and would get a kick out of when she gave them a big smile.


They are still playing dress up almost everyday and so excited to have new dresses in the mix, but enough of their cuteness!

I have been seeing all over Pinterest such beautifully set tables for Fall and Thanksgiving, and don't get me wrong they are absolutely gorgeous, but just not something I can do right now.  We don't have a long dining table anymore and our kitchen table, where we eat all of our meals, usually just has a bowl of fake apples on it...yeah I am that lady! Three meals a day, plus snacks are eaten at this table so a simple centerpiece that doesn't take up too much space is right up my alley.

I did purchase a thick wood slice at Michael's, with a 40% coupon it definitely made it something I couldn't pass up. Then I searched my fall decorations bin to find things in varying heights to put on the wood slice.  I had a vine with little pumpkins on it, so I clipped each pumpkin off and placed them in a vase.  Then I had a Fall-ish floral arrangement so I searched for a tall vase to place it in.  I found the perfect one and it was the perfect height, but I felt it was too plain.


I thought maybe I could dip the rim in some gold paint or maybe spray paint the vase similar to what I did to a mason jar last year.  I landed on something in between and taped off a simple design and then got to spray painting!!


I felt it needed something else and because I had it available, I added the fake corn :)


So, how do you guys decorate your table for the Fall??  I would love to see pictures!!  And don't forget to check back on Friday to see some of my favorite things from around the blog world this week!!

With much love,

Kristin


Follow on Bloglovin

Thursday, October 9, 2014

DIY Wooden Pumpkins & Crafts

This weekend the girls and I did a little crafting with our new craft paint from Michael's - they were having a sale buy 4 for $2!!!  So we picked up eight colors and made our merry way home to get started.  They told me that they wanted lots of little eyes on one of their pumpkins and then the other they wanted to paint.


For the pumpkin with lots and lots of googly eyes, we applied the eyes using glue.  I would have used glue dots, but I was out of those.  Super quick and the girls are super happy.  We actually did those pumpkins after we did our white pumpkins since they were a nice distraction while the white ones dried.


For these pumpkins, I had spray painted them earlier in the day just one light coat.  When the girls were ready to paint, we simply squirted the paint color of their choice near the stem and then it slowly drips down and dries.  The hardest part for them was of course waiting for it to dry.  We did the pumpkins right before nap time, so when they woke up that was the first thing they asked about.

While the girls were napping, I decided to do some crafting of my own.  We had an old 4x4 out in the garage and I sweetly asked Jeremy to cut various sizes for me so I could make some wooden pumpkins (18 inches, 15 inches, and 12 inches).  One of the colors we purchased at Michael's was Burnt Orange, so I used that for my pumpkins.


I lightly sanded each block prior to painting.  After that I painted two coats of the burnt orange on each block.  Once it dried, I gave each block a little sanding around the edges to give it a more distressed look.  Then I took my clippers outside and clipped off a branch from our tree and gave each pumpkin a stem.  I put a dab of wood glue and presto!  I gave it some time to let the glue dry and then tied some ribbon around each stem.


I haven't decided if I am going to add little faces to each pumpkin, but right now I am totally in love with them!  What about you y'all, have you been busy decorating for Fall??

With much love,

Kristin


Follow on Bloglovin

Linking up with:
Dwell Beautiful

Tuesday, September 30, 2014

Fall Mantle Decor - White Pumpkins

I have been moving kind of slow to get the house decorated for Fall this year, but have been adding a few touches here and there.  I decided to get a little crafty/creative this year and see what I could actually make from supplies around the house.  First up was tackling the mantle!!  I bought a bag of little pumpkins at the grocery store last week and most of them are for the girls to paint and have fun with, but I set three aside for me to get crafty with.

While I was at JoAnn's last week for something totally not related to decorating, I did decide to pick up some Martha Stewart craft paint in linen color.  I thought that would be a pretty color to decorate my pumpkins with.  And although the color was pretty, it wasn't turning out exactly like I planned.  I would totally call it user error and plan to use the paint for another project so it will definitely not go to waste.  Well, since I was home and didn't really feel like making a trip to the store with three little ones, I searched the garage for some spray paint.  You know me, I love me some spray paint!!!  The only color we had that was close to my vision was pure white...so that is what I ended up using.  Each pumpkin got two light coats of white spray paint (dry time in between each coat was 20ish minutes).


As you can see, I added a little something extra to my pumpkins!! Using a small paintbrush I put a dab of Mod Podge on the stem and then sprinkled them with gold glitter.  I LOVE IT!!  It is totally imperfect, but made with love!

I repeated this routine for each pumpkin and placed them on the mantle.  With the white mantle and white pumpkins, I felt it needed something to break up all that white and serve the purpose for elevating the pumpkins.  I searched for a small dish or tray that could do just that, but unfortunately I didn't have one that was the right size.  However, we do have some scrap wood in the garage so I started digging through a pile.  I found a perfectly sized 1x4 calling my name.  I checked with Jeremy to make sure he didn't have some plans for this perfect piece of scrap wood and then got to work.  While out in the garage, I also grabbed a sample pot of Valspar Wet Pavement and a brush.  Because this little thought I had was so spur of the moment, I don't have any prep shots to show you.


Jeremy told me about a technique I could use that he has done with his painting called dry brushing.  I used this technique as a guideline, but did modify it a bit.  I dipped the tip of my paint brush into the paint and then brushed the excess off on the side of the can.  Taking the brush I painted strokes on the board.  If it seemed to thick in an area I would use a dry wash cloth to wipe across the board (in the direction of the grain of wood).  There wasn't a lot of paint on the paint brush since I wiped off the excess and did the board in small batches.


There was no sanding of the board, just light strokes with the paint brush and then wiping with a dry wash cloth if needed.  The wash cloth not only helped remove any excess paint, but also helped to spread out the paint.

I placed the three pumpkins on top of the board once it was all dry and instantly fell in love.  Since I wanted to keep the mantle simple, I dug through my fall decorations bin and found two floral arrangements.  I thought they would be perfect to put on each side of the mantle to balance it all out.


I wish I could take credit for the floral arrangements, but I purchased them years ago and honestly don't remember where.

And because I just love the pumpkins, here is another shot of them on the mantle!


Here is a shot of the entire mantle, what do you think??


What about you all, have you started decorating for the Fall?  Do you skip Fall and decorate for Halloween?  I am wanting to incorporate some Halloween decorations as well and thinking of something fun and creative for the front door!!  

With much love,

Kristin


Follow on Bloglovin


Linking up with:
The Blissful Bee

Monday, September 30, 2013

Welcoming in Fall!

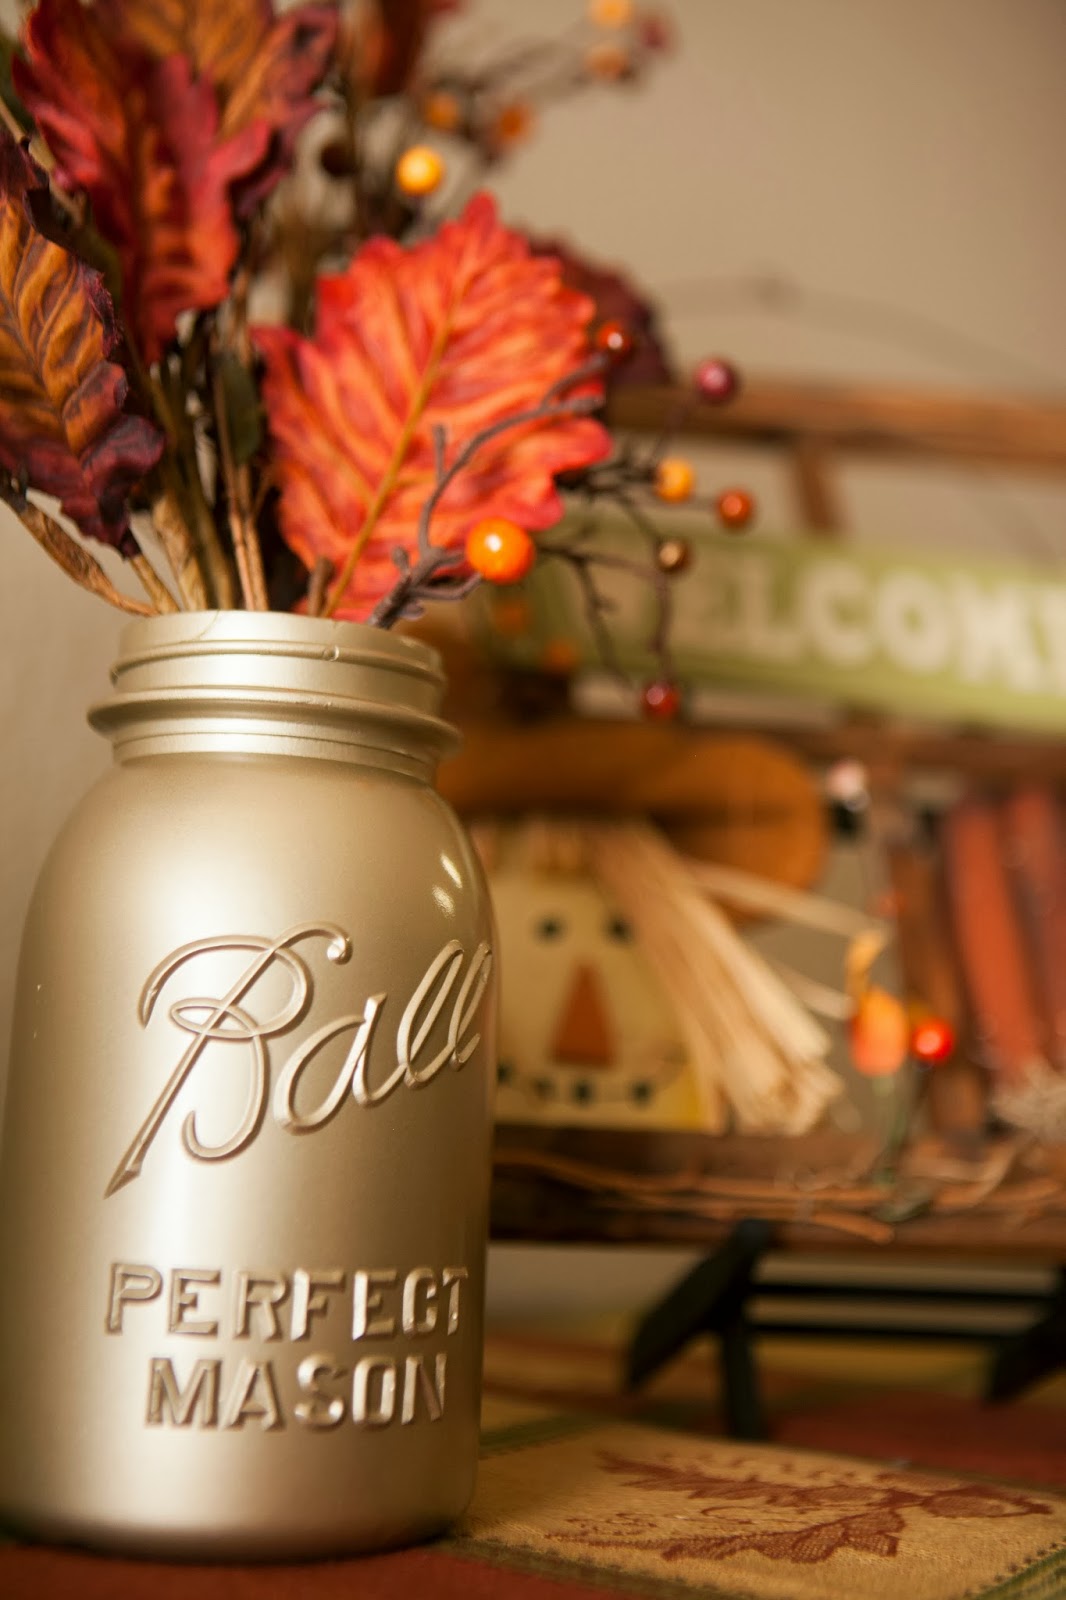
I love adding little touches around the house that welcome in the new holiday season, whether it is for Easter, Halloween, Fall or Christmas...you name it I love to decorate for it.  I have slowly been building up my Fall holiday decor and this year I even added a little DIY flower vase with a mason jar!!


This was a super simple project, totally able to accomplish during nap time, which makes me #onehappymomma!!  I received this mason jar long ago with some beautiful flowers in them when I had Olivia and I have hung on to it ever since.  I would be totally crazy if I didn't keep it!


I wanted to use this jar for some fake flowers that I used to have in my dining room, but I wanted to spruce up the jar for Fall.  Can you say SPRAY PAINT!!!  I purchased this can from Home Depot for $7, Rust-oleum Metallic Champagne Mist.


I am totally smitten with how it turned out and I am in LOVE with the color.   I think I found another winner and looking to see what else I can spray paint with this color!!!  I should probably shout out a big thank you to my hubbie since he is the one that actually picked out the color!!!

Originally, I had this flower arrangement with my "Welcome" sign, but wasn't totally digging it.  After seeing it for a few days I started thinking about simple ways to change it up, which lead me to using the mason jar.


I still like the flower arrangement, and I am sure I will find another place for it.  There is something about the updated mason jar that I really love!!


Here are the other ways I welcomed in Fall around the house!!  Let's start with the entryway shall we :)


You might recognize the Fall printable, and if not then make sure you go here to get your free printable!!  Next up we have our mantle.


I originally had the ceramic pumpkins with my Fall printable on the entryway, but liked them better on the mantle.


I absolutely adore these ceramic pumpkins!!  I purchased them a few years ago at Kohl's at one of their  after holiday sales!!

And because I just LOVE my new mason jar, here is another picture for you!! :)


Happy Fall Y'all!!  Has anyone else brought out the Fall in their home??

With much love,

Kristin


Follow on Bloglovin