

Notice those awesome bins and baskets!!! I have been eyeing the stripped canvas baskets at the bottom for about six months at The Container Store and lucky me I had a gift card so you can bet I put that baby to use!! They are the small ones for only $9.99 each and I love the rope handle.


Currently, we have toys in both baskets so the girls have some toys to play with downstairs as well, but the possibilities are endless on what we can use them for in the future. Enough about the baskets, let's get to the real beauty of this closet…the shelves and cubbies!
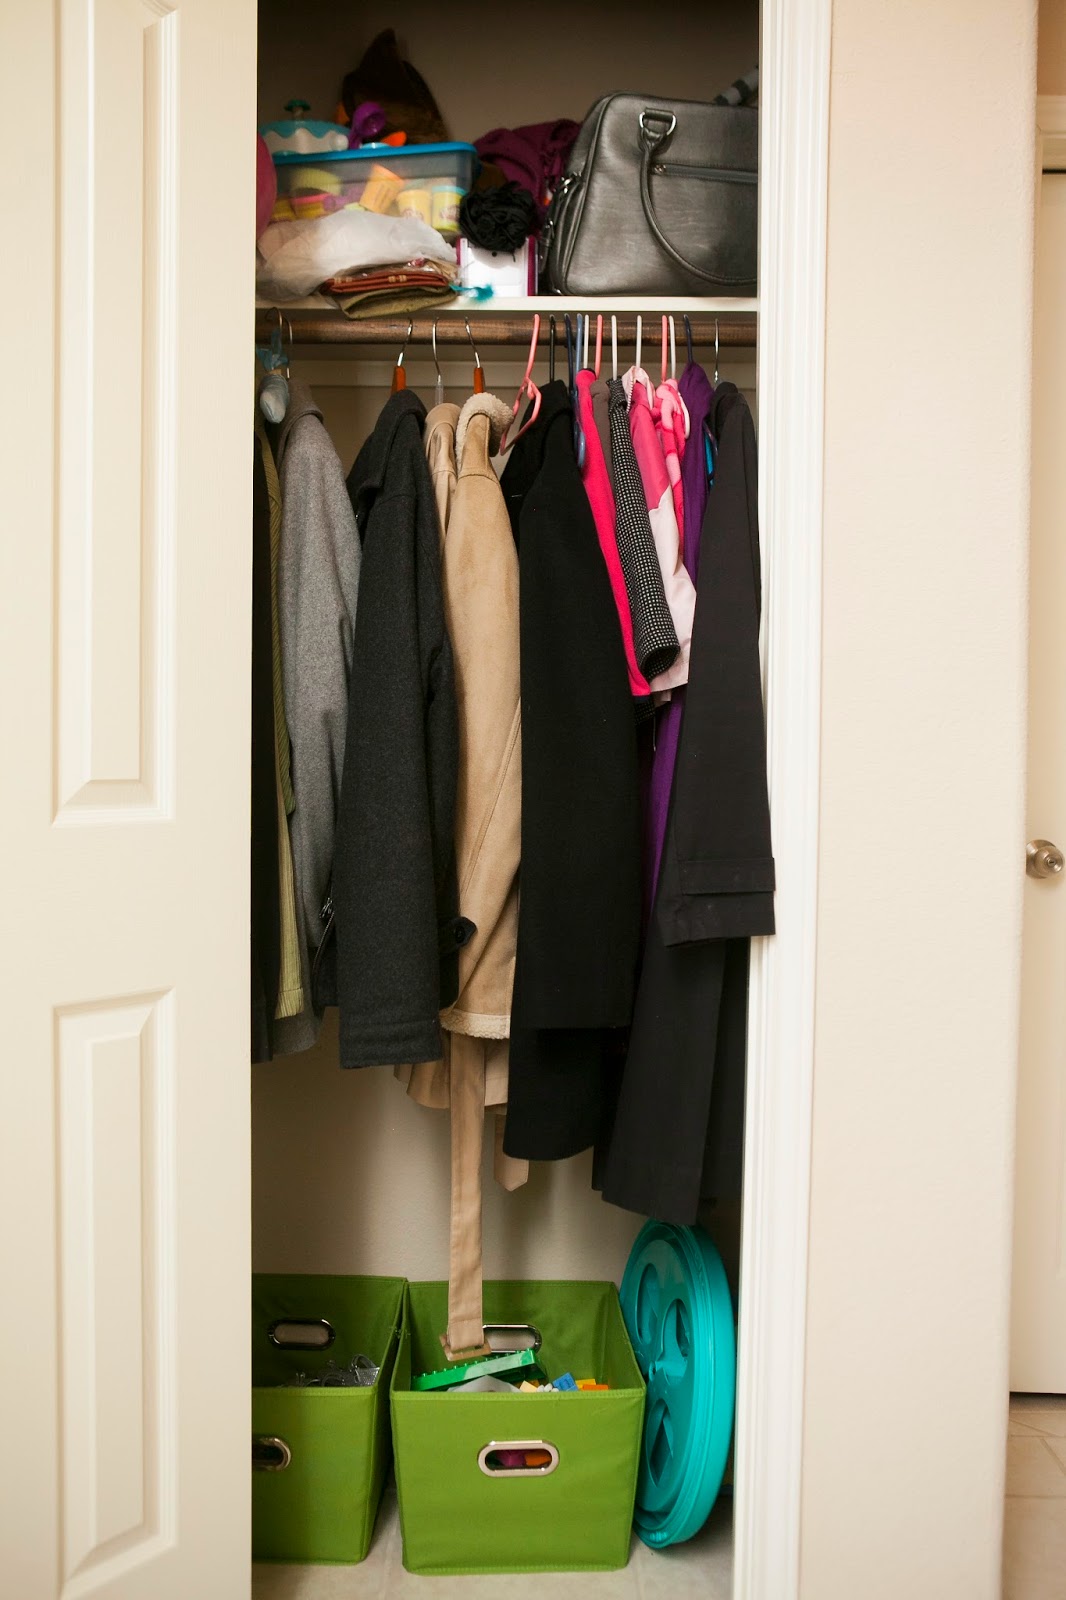
Originally, the closet had one shelf up top and a clothing rod underneath it…not much going on in there except extreme clutter. So Jeremy removed the clothing rod and put up bead board. From there he built a cubby system that could be used to store bins with scarves, hats, etc. We also decided to add two shelves near the bottom to hold some of our most worn shoes.

To make it look more cohesive, we added bead board to the top two cubbies as well. While we waited for the coat hooks to arrive, the bead board and shelves all got a few coats of paint. Finally the hooks arrived from Amazon. I ordered five hooks with the plan to put them inside the closet, but once we started installing them it seemed too crowded. Change of plans, we put four inside the closet and added the remaining one to the door for our coats.

We added a piece of 1x4 pine board, that we stained, all around the closet and then installed the hooks onto the board. Jeremy stained the boards using a slightly different method this time and we are both in love with the result. After sanding down the board and wiping clean, Jeremy used a pre-stain wood conditioner prior to staining (the conditioner is for soft woods and helps prevent a blotchy stain). Then applied two coats of Rust-oleum Ultimate Wood Stain in Dark Walnut using an old white t-shirt.
There were no studs in the closet, so to secure the hooks to the 1x4, we used E-Z Anchors for Drywall that holds up to 50 pounds.

Now it was time to start to using the hooks, shelves and cubbies!!! For the cubbies, I purchased four medium Kiva bins from The Container Store and are currently holding my scarves, girls' hats, and play doh. I am sure you can guess the item that seems out of place, but all the little containers fit perfectly in a bin and easy access when momma is ready for the play-doh to come out. The remaining bin is currently empty, but I am sure in due time I will find the perfect item.
Since we had an extra hook, we put it on the inside of the door to hang our coats on. During the "winter" months we plan to have our coats hanging on the hook and in our master closet for the rest of the year. Since the door is hollow, we used an E-Z Anchor for hollow doors that holds up to 40 pounds.

I put the girls' shoes on the top shelf and our shoes are on the bottom shelf. Since the lower shelves are almost 17 inches deep I can put two rows of their shoes on it, which is a definite plus since they like to have options :)

Unfortunately I don't have an exact breakdown of our spending for the closet since some of the wood and paint we had leftover from previous projects. The most expensive item from the closet is the bead board and I would say was definitely a splurge for this project. A fair estimate with the bead board, puts the cost of the lumber and hooks around $180.
To get the complete transformation of the closet lets see a before and after picture.

If you could see me now, I am grinning ear to ear over here just looking at the picture!! Hope you all have had an awesome week and remember the weekend is almost here!!!
With much love,
Kristin


Looks great!
ReplyDeleteThank you so much!!!
DeleteI love it! Saw your article on Iheart oranizing. :)
ReplyDeleteThank you!! And thank you for stopping by!!
DeleteBeautiful! I am bookmarking this as we are making a small mudroom area near our kitchen door:) Thanks for sharing!!
ReplyDeleteAww, thank you so much! I am glad you liked it and thank you for stopping by!
DeleteHow wide is your closet? I am wanting to do this too but was worried my closet was too small. Thanks!
ReplyDeleteThe width of the closet is 3 feet 3 inches and the depth is 1 foot 7 inches. :)
DeleteCongrats on being featured at IHeart Organizing, Kristin! I love what you did with your closet! I would like to do something similar in our closet sometime in the future.
ReplyDeleteAnd we have those striped bins for our toy storage too! They're great! You can see how we put them into action here. :) http://pinspiredhome.blogspot.com/2014/01/toy-bin-labels.html
Pinning your post for inspiration!
Kim @ pinspiredhome.blogspot.com
I am absolutely in love with the striped bins too!!! I love your labeling of the bins with your laminator!!!
DeleteCould You please tell Me if You and/or Your Husband are tall? If so,How high did He mount the bottom of the lowest shelf,From the bench? My problem is that I found the standard/recommended height for the bench ("18 with finished cushion & a 12 degree angle if I decide to add a back wedge to the rear wall,According to This Old House & Martha Stewart magazines) But,My problem is that I am very petite,Standing a challenging '4 "11.My 2 teenage Boys take after My dearly departed Husband who was '6 "5! The 2 boys are only 14 & 16 years old yet are already '6 each.Everytime I make something,Or hang a picture (Or worst yet,A mirror) I think it's set at a wonderful height that will be a little high for Me & slightly low for Them.Yet all I hear is complaints that "It's too low" or "My head is hitting this pendant,Mom!!" I tend to attach things to the walls TOO WELL,So I'd really appreciate the distance between the seat & where the upper shelves start,So I can make sure Their heads clear.The entire point of My transforming My small entry closet of My post-war Cottage Bungalow,Into a "mini-Mudroom",Is to provide The Boys a convenient place to sit down to take off Their shoes (The way I trained Them when They were little,To do!) But as We all know,Teenager's tend to be very lazy when it comes to "details" like that & I'm tired of replacing My living room area rug annually,Because all of the "I'm only running in for a second,I can't take My shoes off",Finally ruins the rug & Spot Shot stops working.I have an all white living room & have taken care to but durable,washable materials (mostly cotton twill Slipcovers" because after raising 2 Girls & 2 Boys,I have learned that it's not what color You choose in fabrics,It's how washable/durable & sturdy those choices have to be.I can maintain white slipcovers & white walls (Accent colors are on 1 wall & interchangeable pillows,etc but for the Life of Me,Cannot keep an area rug more then a year & a natural material like Sisal,Is out of the question because of Our Pets.Thanks in advance for Your response & BTW,It looks great!!
ReplyDeleteMy husband and I are both tall: almost 6 feet for myself and 6' 2" for my husband. I am not sure I fully understand your question :( The shelves at the bottom where we put our shoes come up to 25" although we don't sit on the shelves. They are sturdy enough for us to sit on them, it isn't something we considered when installing them. The distance between the bottom shelves and the cubbies is about 34". Please let me know if you need anymore information. :)
Delete